

Your scanner can send emails through Azure – here's how to set it up.
Office scanners and multifunction printers often include a "Scan to Email" feature. But getting it to work reliably can be frustrating. Many ISPs block SMTP ports, Gmail and Microsoft 365 have tightened their authentication requirements, and managing app passwords is a hassle.
Azure Communication Services offers a clean solution: a dedicated SMTP relay service that works with any device supporting standard SMTP authentication. No app passwords, no OAuth complexity – just straightforward username and password authentication over TLS.
Why Azure Communication Services?
| Challenge | Azure Communication Services Solution |
|---|---|
| ISP blocking port 25 | Use port 587 with TLS |
| OAuth requirements | Simple username/password auth |
| Sender reputation | Microsoft-managed infrastructure |
| Custom domain | Full support with SPF/DKIM |
| Reliability | Enterprise-grade Azure service |
What You'll Need
Before we start, make sure you have:
- An Azure subscription
- A scanner or printer with SMTP support
- (Optional) A custom domain for sending emails
Step 1: Create an Email Communication Service
First, create an Email Communication Service resource in Azure. Search for "Email Communication Services" in the Azure Portal and create a new resource.
Once created, you need to provision a domain. You have two options:
- Azure-managed domain – Quick setup, uses some alphanummeric (guid) subdomain
xxxxxxxx.azurecomm.net - Custom domain – Your own domain like
notification.yourdomain.com
For production use, we recommend a custom domain – it looks more professional and builds trust with recipients.
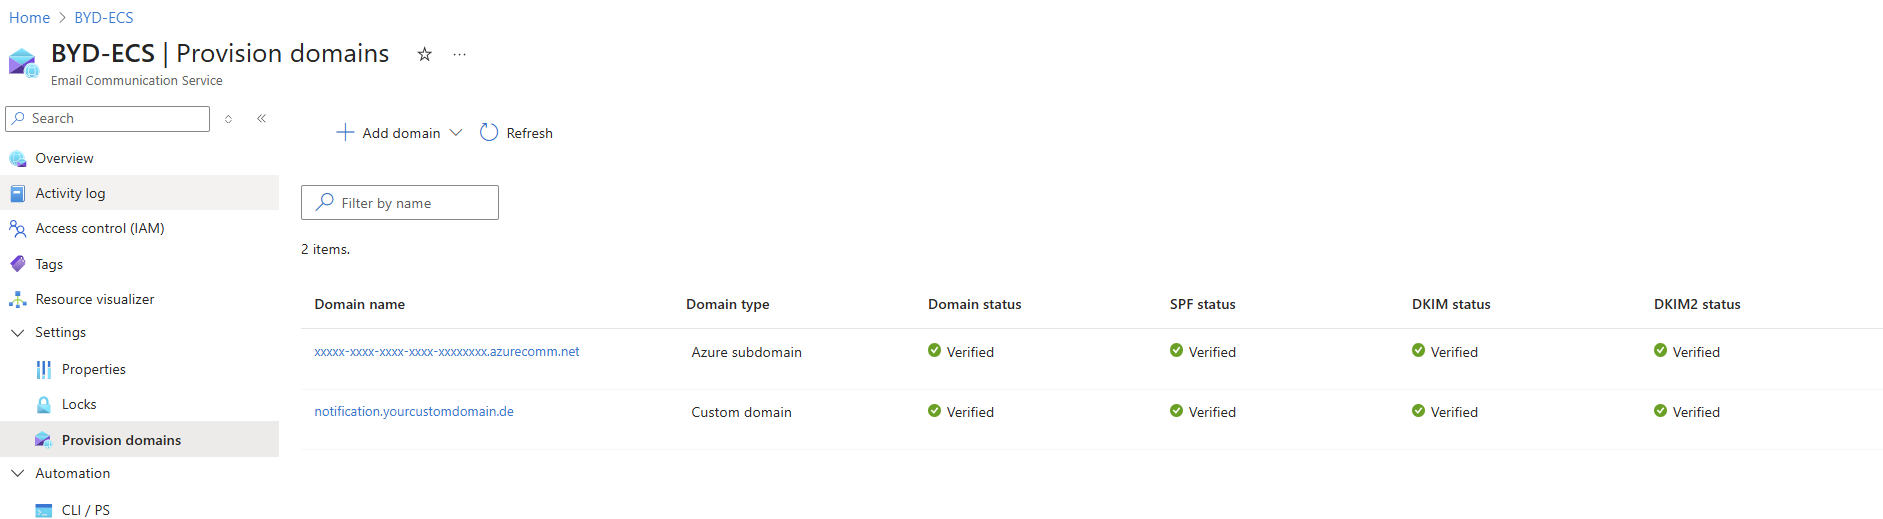
Step 2: Add and Verify Your Custom Domain
If you're using a custom domain, you need to verify ownership by adding DNS records. Azure will provide you with the required records:
Required DNS Records
| Type | Name | Value | Purpose |
|---|---|---|---|
| TXT | @ | MS verification string | Domain ownership |
| TXT | @ | SPF record | Sender authentication |
| CNAME | selector1._domainkey | DKIM key 1 | Email signing |
| CNAME | selector2._domainkey | DKIM key 2 | Email signing |
Add these records to your DNS provider and wait for verification. This typically takes a few minutes but can take up to 48 hours depending on DNS propagation.
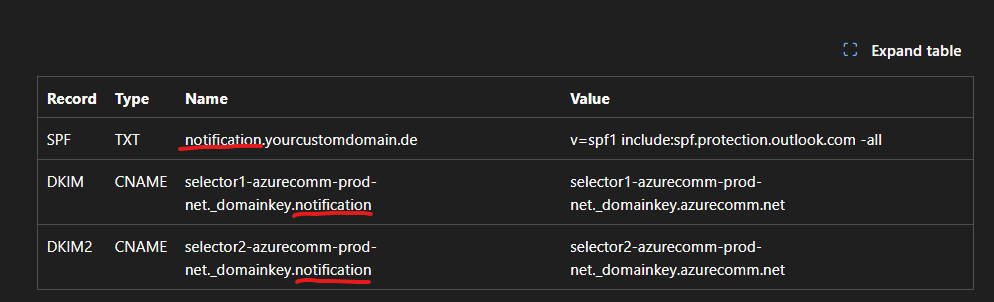
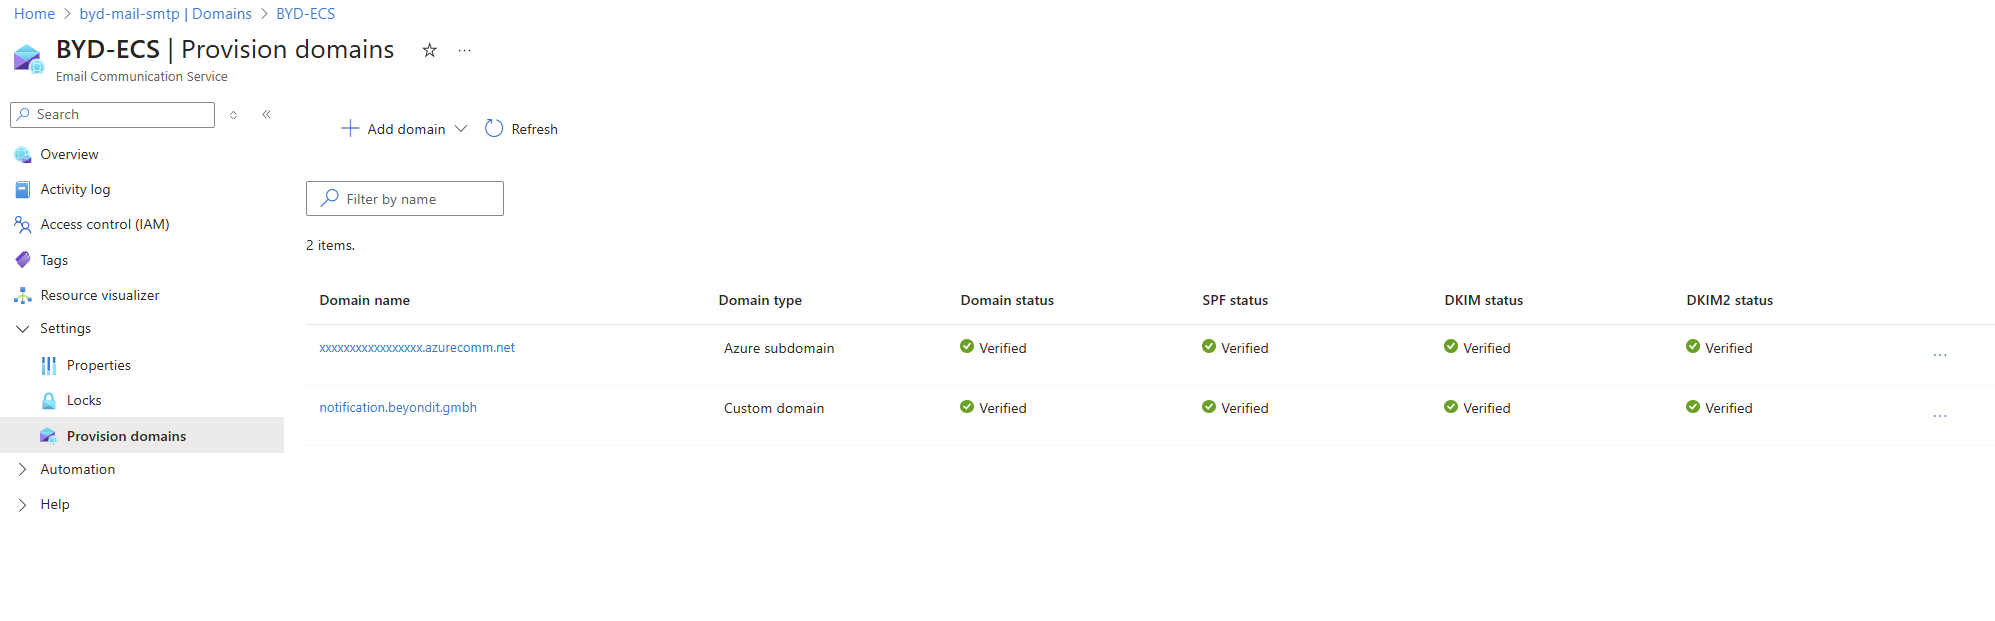
Once verified, you'll see green checkmarks for Domain, SPF, DKIM, and DKIM2 status:
Step 3: Create a Communication Service Resource
Now create a Communication Service resource (not to be confused with the Email Communication Service). This is the main resource that will handle SMTP authentication.
After creation, connect your Email Communication Service domain(s) to this resource:
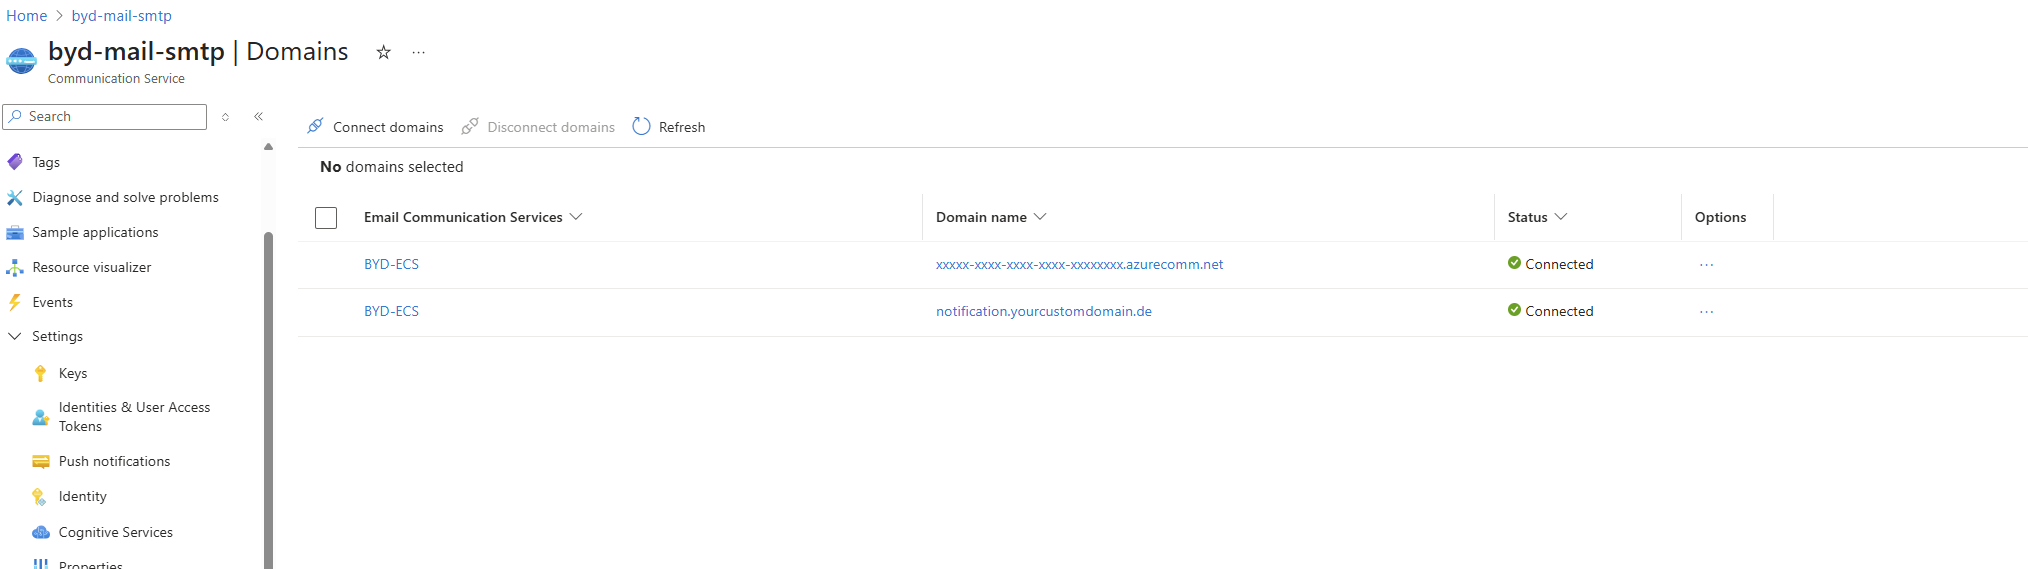
Both your Azure-managed domain and custom domain should show as "Connected".
Step 4: Register a Microsoft Entra Application
Azure Communication Services SMTP uses Microsoft Entra (formerly Azure AD) for authentication. You need to:
- Go to Microsoft Entra ID → App registrations
- Create a new registration (e.g., "smtp-scanner")
- Note the Application (client) ID
Create a Client Secret
In your app registration, go to Certificates & secrets and create a new client secret:

Important: Copy the secret value immediately – you won't be able to see it again. This secret will be your SMTP password.
Assign Permissions
The Entra application needs the Contributor role on your Communication Service resource, or a custom role with these permissions:
Microsoft.Communication/CommunicationServices/ReadMicrosoft.Communication/CommunicationServices/WriteMicrosoft.Communication/EmailServices/Write
Step 5: Create an SMTP Username
In your Communication Service resource, navigate to Email → SMTP Usernames (preview) and create a new username:

Username Configuration
| Field | Value | Notes |
|---|---|---|
| Username | [email protected] |
Must be email format with a connected domain |
| Entra Application | Your registered app | Select from dropdown |
| Communication Service | Your service | Auto-selected |
The username must use one of your connected domains. If you want to send from a custom domain, use that domain in the username (e.g., [email protected]).
Step 6: Configure MailFrom Address
To send emails from your custom domain, configure a MailFrom address. In your Email Communication Service, go to Provision domains → select your domain → MailFrom addresses:
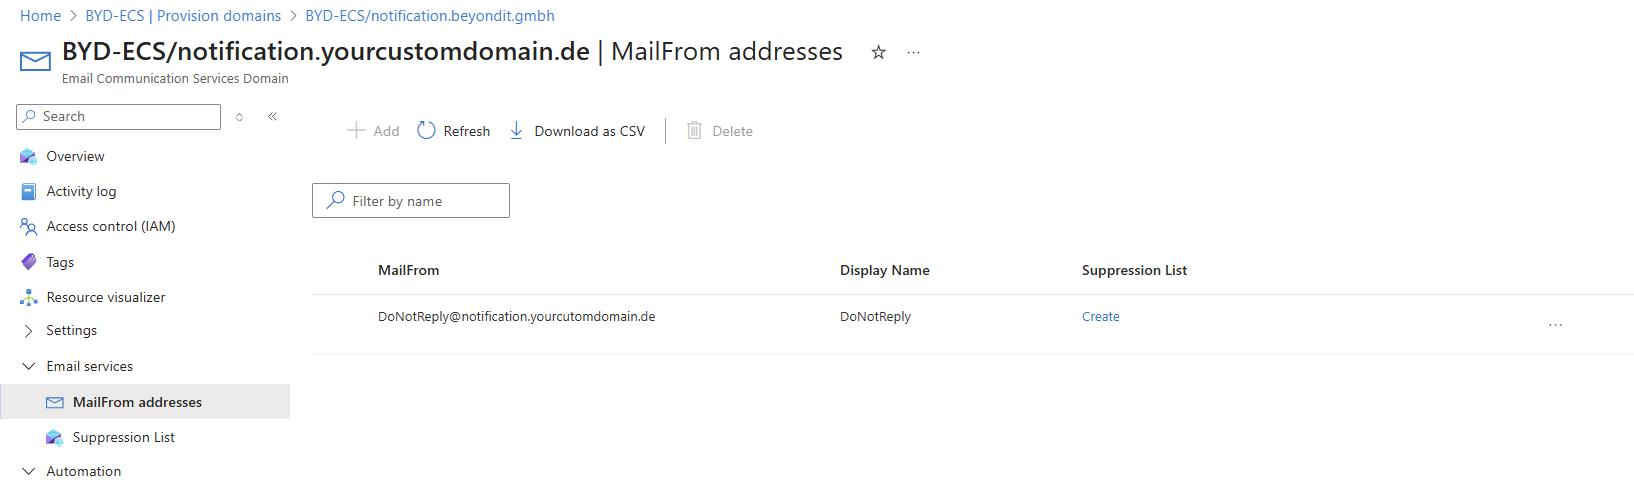
Add addresses like:
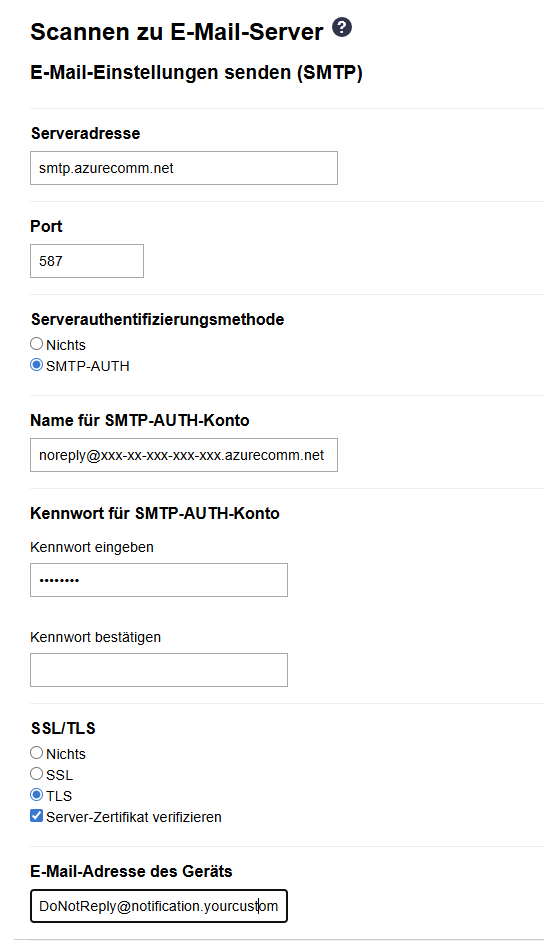
Step 7: Configure Your Scanner
Now for the fun part – configuring your scanner or printer. Here's an example using a Brother device:

SMTP Settings
| Setting | Value |
|---|---|
| Server Address | smtp.azurecomm.net |
| Port | 587 |
| Authentication | SMTP-AUTH |
| Username | Your SMTP username (e.g., [email protected]) |
| Password | Your Entra app client secret |
| SSL/TLS | TLS (StartTLS) |
| Verify Certificate | Yes |
| Device Email Address | Your MailFrom address (e.g., [email protected]) |
Using a Custom Domain as Sender
If you configured a custom domain, you can use it as the sender address. The "Device Email Address" (or "From" address) should match one of your configured MailFrom addresses:
Testing Your Setup
- Place a document in your scanner
- Select "Scan to Email"
- Enter a recipient address
- Send!
If everything is configured correctly, the recipient will receive an email from your configured sender address with the scanned document attached.
Troubleshooting
"Authentication failed"
Possible causes:
- Wrong username format (must be email format with connected domain)
- Client secret expired or incorrect
- Entra app doesn't have required permissions
Solution: Double-check your SMTP username in Azure Portal and ensure the client secret is correct. Verify the Entra app has Contributor role on the Communication Service.
"Connection refused" or timeout
Possible causes:
- Port 587 blocked by firewall
- Using IP address instead of DNS name
Solution: Azure Communication Services only accepts connections via DNS name (smtp.azurecomm.net), not IP addresses. Ensure port 587 outbound is allowed.
"Sender address rejected"
Possible causes:
- Device email address doesn't match a MailFrom address
- Domain not verified
Solution: The "From" address must be one of your configured MailFrom addresses. Verify your domain is properly set up.
Emails going to spam
Possible causes:
- Missing or incorrect SPF/DKIM records
- Using Azure-managed domain
Solution: Use a custom domain with properly configured SPF and DKIM records. Azure-managed domains may have lower reputation.
Cost Considerations
Azure Communication Services Email pricing (as of 2025):
- First 100,000 emails/month: Included with base fee
- Additional emails: ~$0.00025 per email
For typical scanner usage (a few hundred emails per month), costs are negligible.
Security Best Practices
- Use a dedicated Entra app – Don't reuse apps for other purposes
- Set secret expiration – Rotate secrets regularly (e.g., annually)
- Limit MailFrom addresses – Only configure addresses you actually need
- Monitor usage – Check Azure Portal for unusual sending patterns
- Use custom domain – Better reputation and easier troubleshooting
The BEYONDIT Take
We've deployed this setup for several clients who were struggling with unreliable scan-to-email functionality. The Azure Communication Services approach is:
- Reliable – Microsoft's infrastructure handles delivery
- Secure – TLS encryption, no legacy protocols
- Manageable – All configuration in one place (Azure Portal)
- Cost-effective – Minimal costs for typical office usage
If your scanner's email feature has been collecting dust because "it never works anyway," give this setup a try. It's more straightforward than you might expect.
Summary
Here's the complete configuration at a glance:
| Component | Value |
|---|---|
| SMTP Server | smtp.azurecomm.net |
| Port | 587 |
| Encryption | TLS 1.2+ (StartTLS) |
| Authentication | SMTP-AUTH (username/password) |
| Username | SMTP username from Azure Portal |
| Password | Microsoft Entra client secret |
| From Address | Configured MailFrom address |
Your scanner emails, powered by Azure – reliable and secure.
Questions about the setup? We're happy to help.
